1. Tutorial: Counter
This tutorial will demonstrate how to use ReactGenie to build a simple Counter app. You don't need to write code in this part, just follow the instructions to understand how to use ReactGenie to build a multimodal app.
1.1 ReactGenie Overview
We'll start with a brief introduction to the ReactGenie framework to help you understand how to build multimodal applications using ReactGenie.
ReactGenie is a framework help developers to build a multimodal app. ReactGenie will automatically parse users' natural language queries to function calls based on LLM, execute the command and then display the result. As developers, you only need to give some descriptions and examples to help ReactGenie handle user's query.
Each multimodal app built with ReactGenie consists of three parts:
-
State Code: This is used to control and manage the state, such as data and executing functions. It is written in the
geniefolder. -
UI Code: This is used to display the state data and allow users to interact with the data via the UI. It is written in the
srcfolder. -
Link UI to State code: This involves linking the State to UI so ReactGenie knows using which UI to render which type of results. You will need to modify
App.tsxandstore.ts.
For example, in the upcoming Counter app tutorial, the state code includes the Counter class (Counter.ts) for counter state management,
and the UI code includes views of the counter input form and the interface for added counters (e.g., EditCounterView.tsx).
The structure of the Counter app is as follows:
- genie
   - //state code
   - Counter.ts
- src
   - //UI code
   - EditCounterView.tsx
   - CounterItemView.tsx
   - CounterListView.tsx
   - MainView.tsx
-App.tsx
-store.ts
We'll provide more detailed instructions in the later sections. You can also refer to the ReactGenie documentation for additional guidance.
In the following section, we'll demonstrate how to implement a simple Counter App with ReactGenie. We'll follow the path as defined about: we'll start by defining our state management class, then implement our UI, and finally, integrate our state data and actions into the UI.
1.2 Environment Check
Open WebStorm, we have prepared a starter project for you called Counter
The tutorial below will guide how to construct a new Counter using this starter project. To run the starter ReactGenie project, you can use the following commands:
npm install
npx expo start --web
You should see the following content in the browser:
Welcome to ReactGenie Developer Study !Note that the ReactGenie framework provides a microphone button on the bottom right of the webpage. Users can click this button to utilize the React Genie voice interface when they would like to. Users can also continue to use the graphical user interface (GUI) as they please.
1.3 State Code
1.3.1 Create state classes
ReactGenie provides you with two inbuilt classes that you can extend from for your state classes.
- DataClass: A DataClass is the basic unit for data management, and an instance of a DataClass can be viewed as a record in a database. The property in a DataClass can be a number, string, boolean, list, DataClass, or a HelperClass. Read more in the docs (opens in a new tab).
- HelperClass: The HelperClass stores and manages complex data types. They will be used to define complex properties in a Dataclass, so that they can be serialized and deserialized. Read more in the docs (opens in a new tab).
Note: You don't need to create any HelperClass today. However,
you will need to use predefined HelperClass (i.e., TimeDelta) while building Timer for creating complex properties in your DataClass.
Let's get started with implementing a Counter Dataclass to store and manage our Counters!
Initialize the file Counter.ts under the genie folder:
-genie
    -Counter.ts
To create a DataClass, you need to define all the properties of the DataClass in primitive types (e.g., string, int,
boolean), arrays of primitive types, compound types using HelperClass, or arrays of compount types.
import { GenieClass, DataClass, int } from "reactgenie-lib";

export class Counter extends DataClass{
    public name: string;
    public type: string;
    public count: int;
    public created: boolean;
}
Now we're introducing a key concept in ReactGenie, the ReactGenie decorators. ReactGenie can transform users' natural language queries to function calls. To achieve this, you need to add a ReactGenie decorator for the classes, functions, and properties that you want the users to be able to access with multimodal interactions (voice + touch). In the decorator, you can optionally specify a string to describe the purpose of the class, function, or property. The description you provided in the decorator will be passed to LLM to help ReactGenie understand it.
import { GenieClass, DataClass, GenieProperty, int } from "reactgenie-lib";

@GenieClass("A counter example")
export class Counter extends DataClass{
    @GenieProperty("The name of object that you want to count")
    public name: string;
    @GenieProperty("The type of objects (vegetable, fruit, ...)")
    public type: string;
    @GenieProperty() // You can omit the description
    public count: int;
    @GenieProperty() // You can omit the description
    public created: boolean;
}
This class is still missing one important piece. Each DataClass requires a key to
help ReactGenie manage the classes. The key has to be unique for each instance of the class.
In ReactGenie, this is done through annotating the key property with a @GenieKey decorator.
Let's add this to our class:
import { GenieClass, DataClass, GenieKey, GenieProperty, int } from "reactgenie-lib";

@GenieClass("A counter example")
export class Counter extends DataClass{
    @GenieKey
    public id: string;

    @GenieProperty("The name of object that you want to count")
    public name: string;
    @GenieProperty("The type of objects (vegetable, fruit, ...)")
    public type: string;
    @GenieProperty() // You can omit the description
    public count: int;
    @GenieProperty() // You can omit the description
    public created: boolean;
}
To recap, a state class (DataClass) in ReactGenie requires three types of decorators:
@GenieClass("{description of the class}")that extendsDataClass@GenieProperty("{description of the property}"): properties that you want to expose to ReactGenie@GenieKey: a unique key for each instance of the class
1.3.2 State class management
Now that we've defined our properties, we need to initialize these properties using a constructor. This is required for all the properties.
import { GenieClass, DataClass, GenieKey, GenieProperty, int } from "reactgenie-lib";

@GenieClass("A counter example")
export class Counter extends DataClass{
    @GenieKey
    public id:string;

    @GenieProperty("The name of object that you want to count")
    public name: string;
    @GenieProperty("The type of objects (vegetable, fruit, ...)")
    public type: string;
    @GenieProperty()
    public count: int;
    @GenieProperty()
    public created: boolean;

    constructor({id, name, type, count = 0, created}: {id: string, name: string, type: string, count?: int, created:boolean}) {
        super({})
        this.id = id;
        this.name = name;
        this.type = type;
        this.count = count
        this.created = created;
    }
}
NOTE You should AVOID directly calling the constructor like below:
const counter = new Counter({id: "1", name: "apple", type: "fruit", count: 0, created: true})Objects created like this will not be automatically tracked by ReactGenie. Instead, ReactGenie provides the three static functions below to help you manage the object, CreateObject(), GetObject(), DeleteObject(), All().
CreateObject() will call the constructor of the class, so the parameters of CreateObject() is the same as constructor.
GetObject() allows you to access a object through its GenieKey.
All() allows you to get an array of all instances of a specific class.
DeleteObject() allows you to delete a object through its GenieKey.
Please use these functions to create and access the objects so that ReactGenie can track the objects. For example:
const appleCounter = Counter.CreateObject({id: "1", name: "apple", type: "fruit", count: 0, created:true})
const getAppleCounter = Counter.GetObject({id: "1"}) // getAppleCounter === appleCounter
const allCounters = Counter.All() // allCounters === [appleCounter]
Counter.DeleteObject({id: "1"})
const allCountersAfterDelete = Counter.All() // allCountersAfterDelete === []
Note that only All() is automatically exposed to multimodal interactions.
If you want to allow users to access other functions to handle the objects, you need to create a function and add a ReactGenie decorator for it.
For example, if we want to allow users to say "Create an apple counter", we need to create a function like:
import { GenieClass, DataClass, GenieKey, GenieProperty, GenieFunction, int } from "reactgenie-lib";

@GenieClass("A counter example")
export class Counter extends DataClass{
    //...
    //...

    @GenieFunction()
    static CreateCounter({name, type, count=0, created}:
            {name:string, type:string, count?:int, created:boolean}): Counter {
        const id = Counter.All().length.toString(); // automatically generate a unique id
        return Counter.CreateObject({id: id, name: name, type: type, count: count, created: created})
    }
}
1.3.3 Setup placeholder objects
ReactGenie provides you with class initialization settings, where you can set static variables for the class or create placeholder objects. The setup() function is a static function of the GenieClass. You can override the setup function for initial program setup and can also make it empty. ReactGenie will automatically call the function to complete the initialization.
For counter, we can set up three counters in the initialization.
@GenieClass("A counter example")
export class Counter extends DataClass{
    //...
    static setup() {
        Counter.CreateCounter({name:"apple", type:"fruit",created:true});
        Counter.CreateCounter({name:"orange", type:"fruit", created:true});
        Counter.CreateCounter({name:"potato", type:"vegetable", created:true});
    }
}
1.3.4 Add you own functions
Next, you can create more functionalities for your class. For example, you can create functions to increment, decrement, and delete the counter. Don't forget to add ReactGenie decorators as these functions should be accessible to users via multimodal interactions.
@GenieClass("A counter example")
export class Counter extends DataClass{
    //...

    @GenieFunction()
    increment(): void {
        this.count = this.count + 1;
    }

    @GenieFunction()
    decrement(): void {
        this.count -= 1;
    }

    @GenieFunction()
    delete(): void {
        Counter.DeleteObject({id: this.id});
    }
}
Of course, you can also create functions to set names, types, etc., to support more features. Here we get an example state code for Counter:
Counter.ts
import {GenieClass, DataClass, GenieKey, GenieProperty, int, GenieFunction} from "reactgenie-lib";

@GenieClass("A counter example")
export class Counter extends DataClass{
    @GenieKey
    public id: string;

    @GenieProperty("The name of object that you want to count")
    public name: string;
    @GenieProperty("The type of objects (vegetable, fruit, ...)")
    public type: string;
    @GenieProperty()
    public count: int;
    @GenieProperty()
    public created: boolean;

    constructor({id, name, type, count = 0, created}:
                    {id: string, name: string, type: string, count?: int, created:boolean}) {
        super({})
        this.id = id;
        this.name = name;
        this.type = type;
        this.count = count
        this.created = created;
    }

    @GenieFunction()
    static CreateCounter({name, type, count=0, created}:
                             {name:string, type:string, count?:int, created:boolean}): Counter {
        const id = Counter.All().length.toString();
        return Counter.CreateObject({id: id, name: name, type: type, count: count, created: created})
    }

    static setup() {
        Counter.CreateCounter({name:"apple", type:"fruit",created:true});
        Counter.CreateCounter({name:"orange", type:"fruit", created:true});
        Counter.CreateCounter({name:"potato", type:"vegetable", created:true});
    }

    @GenieFunction()
    increment(): void {
        this.count = this.count + 1;
    }

    @GenieFunction()
    decrement(): void {
        this.count -= 1;
    }

    @GenieFunction()
    delete(): void {
        Counter.DeleteObject({id: this.id});
    }
}
1.4 Design UI Code
1.4.1 Write UI code
Now we need to determine what to display in a Counter app and what kind of graphical UI to construct. The Counter app will comprise two pages, one dedicated to editing a specific Counter and the other designed to display the list of Counters.
- src
    - //For a specific Counter
    - EditCounterView.tsx

    - //For a list of Counters
    - CounterItemView.tsx
    - CounterListView.tsx

    - //Main view: add counter button and the list
    - MainView.tsx
Like React, you need to implement the UI interface in the form of a component.
export default function MyApp() {

  return (
    <div>
      <h1>Welcome to my app</h1>
      <MyButton />
    </div>
  );
}
In addition, you need to bind this component with a specific data type so that when ReactGenie obtains the execution results, it will use the page you specified for display.
So the code is divided into two parts. The first part involves the specific implementation of the UI, and the second part deals with binding the UI with data types.
We need to decide what to display on the interface and design the UI elements, it includes the label, input box, button, etc. For example, we can display the name, type, and count of the counter, and add buttons to increment, decrement.
To get the state data with the UI, we need to use useGenieSelector() to obtain ReactGenie object.
We can obtain the ReactGenie object data based on the parameters passed in by the component (e.g., props: {id:string}) and modify the data according to user operations.
Below are files that demonstrate the implementation of UI and get data using useGenieSelector.
Don't forget to import React in the .tsx file.
The edit page is used to modify the counter or create a new counter. The button on this page should dynimically change according to the creation state of the counter.


EditCounterView.tsx
import React from "react";
import {useGenieSelector} from "reactgenie-lib";
import {Counter} from "../genie/Counter";

//implementation
const EditCounterViewImpl = (props:{id?:string}) => {//pass the id to EditCounterView
    const counter =  useGenieSelector(() => {//get counter by id
        return Counter.GetObject(props);
    });

    return (
        <div>
            <div >
                {/*display all the information of the counter*/}
                <label>Title </label>
                <input type='text' size={20} value={counter.name}
                       onChange={(e) => counter.name = e.target.value}></input>
                <label>Description </label>
                <input type='text' size={20} value={counter.type}
                       onChange={(e) => counter.type = e.target.value}></input>
                <label>Count </label>
                <input type='number' value={counter.count}
                       onChange={(e) => counter.count = parseInt(e.target.value)}></input>
            </div>
                {
                    //show different UI button for creating and editing
                    !counter.created?
                        <div>
                            <button onClick={() => {
                                counter.created = true;
                                //TODO: return to main page
                            }}>Add Counter</button>
                            <button onClick={() => {
                                counter.delete();
                                //TODO: return to main page
                            }}>Cancel</button>
                        </div>
                        :
                        <div>
                            <button onClick={() => {
                                //TODO: return to main page
                            }}>Save Counter</button>
                            <button onClick={() => {
                                counter.delete();
                                //TODO: return to main page
                            }}>Delete Counter</button>
                        </div>
                }

        </div>
    );
};
//binding
export const EditCounterView = EditCounterViewImpl; //TODO: need to be linked
Counter item shows the brief information of the counter. And Count list contains several counter items.
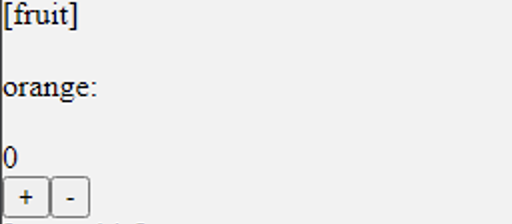
CounterItemView.tsx
import React from "react";
import {Pressable} from "react-native";
import {useGenieSelector} from "reactgenie-lib";
import {Counter} from "../genie/Counter";

const CounterItemViewImpl = (props: {id:string}) => { //pass the id to CounterItemView
    const counter =  useGenieSelector(() => {//get counter by id
        return Counter.GetObject(props);
    });

    return (
        <div>
        <Pressable onPress={() => {/*TODO: press to edit page*/}}>
                <label>[{counter.type}]</label> <br/> <label>{counter.name}: </label> <br/> <label> {counter.count}</label>
        </Pressable>
        <div>
                <button onClick={() => counter.increment()}>+</button>
                <button onClick={() => counter.decrement()}>-</button>
        </div>
        </div>
    )
}

export const CounterItemView = CounterItemViewImpl//TODO: need to be linked
CounterListView.tsx
import React from "react";
import { CounterItemView } from "./CounterItemView";

const CounterListViewImpl = (props:{elements: { id: string }[] }) => { //pass the counters to CounterListView
    const counters =  props.elements

    return (
        <div>
            {
                counters.map((element) => {
                    return <CounterItemView id={element.id} key={element.id}/>
                })
            }
        </div>
    )
}

export const CounterListView = CounterListViewImpl;//TODO: need to be linked
Finally, we need to create a MainView page. MainView page contains a button to create a new counter and a list of counters.
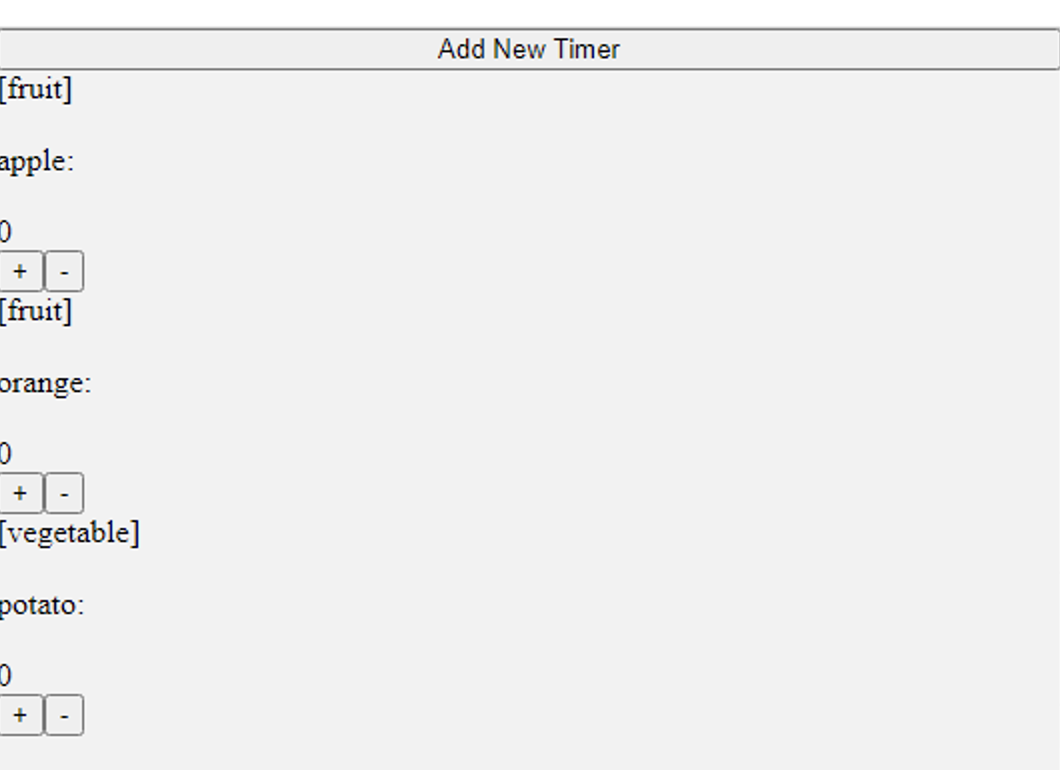
MainView.tsx
import React from "react";
import {View} from "react-native";
import {CounterListView } from "./CounterListView";
import {useGenieSelector} from "reactgenie-lib";
import {Counter} from "../genie/Counter";

export const MainView = () => {
    const allCounters =  useGenieSelector(() => {
        return Counter.All(); //get all counters
    });

    return (
        <View>
            <View >
                <button onClick={() => {
                    //create a new counter to edit
                    const counter = Counter.CreateCounter({name: "", type: "default",created: false});
                    //TODO: jump to edit counter
                }}>Add New Timer</button>
            </View>

            <CounterListView elements={allCounters}/>
        </View>
    )
}We need to include the main UI framework in App.tsx.
ReactGenie UI must be implemented in ModalityProvider.
import React from "react";
import {Provider} from "react-redux";
import ENV from "./config";
import {reactGenieStore} from "./store";
import {ModalityProvider} from "reactgenie-lib";


const App = () => {

return (
<Provider store={reactGenieStore}>
    <ModalityProvider
        displayTranscript={true}
        codexApiKey={ENV.OPENAI_API_KEY!}
        codexApiBaseUrl={ENV.OPENAI_API_BASE_URL!}
        azureSpeechRegion={ENV.AZURE_SPEECH_REGION!}
        azureSpeechKey={ENV.AZURE_SPEECH_KEY!}
        extraPrompt={'// we are using voice recognition. so there may be errors. Try to think about words with similar sounds. For example "address" can actually be "add this".'}
    >
        {/*UI framework*/}

    </ModalityProvider>
</Provider>
);
};

export default App;
1.4.2 Page Management with AppNavigator
You can see there are many TODOs in the code, they are the places for managing pages switch.
Here we will use AppNavigator to handle the switch between pages.
AppNavigator is just like a stack for pages, you can display the new page with push()
and back to the previous page with pop().
We can define two pages for MainView page and EditCounter page,
then register two pages with AppNavigator in App.tsx with AppNavigator
App.tsx
import React from "react";
import {Provider} from "react-redux";
import {NativeStackScreenProps} from "@react-navigation/native-stack";
import {createStackNavigator} from '@react-navigation/stack';
import {cardStyle, modalStyle} from "./src/commonStyles";

import ENV from "./config";
import {reactGenieStore} from "./store";
import {ModalityProvider} from "reactgenie-lib";
import {EditCounterView} from "./src/EditCounterView";
import {MainView} from "./src/MainView";

export let AppNavigator: any = null;
type Props = NativeStackScreenProps<any, any>

const CounterTab = ({route, navigation}: Props) => {
    AppNavigator = navigation
    return (
        <MainView {...route.params}/>
    )
}

const EditCounterTab = ({route, navigation}: Props) => {
    AppNavigator = navigation
    return (
        <EditCounterView {...route.params}/>
    )
}

const App = () => {
    let CounterStack = () => {
        let CounterNavigator = createStackNavigator();
        return (
            <CounterNavigator.Navigator screenOptions={{headerShown: true}}>
                <CounterNavigator.Screen name="Counters" component={CounterTab} options={cardStyle}/>
                <CounterNavigator.Screen name="EditCounter" component={EditCounterTab} options={modalStyle}/>
            </CounterNavigator.Navigator>
        );
    };

    return (
        <Provider store={reactGenieStore}>
            <ModalityProvider
                displayTranscript={true}
                codexApiKey={ENV.OPENAI_API_KEY!}
                codexApiBaseUrl={ENV.OPENAI_API_BASE_URL!}
                azureSpeechRegion={ENV.AZURE_SPEECH_REGION!}
                azureSpeechKey={ENV.AZURE_SPEECH_KEY!}
                extraPrompt={'// we are using voice recognition. so there may be errors. Try to think about words with similar sounds. For example "address" can actually be "add this".'}
            >
                <CounterStack/>
            </ModalityProvider>
        </Provider>
    );
};

export default App;
Then we can use push() and pop() for update pages.
For example, we can click the button in MainView to create a new counter and jump to EditCounter page.
import {AppNavigator} from "../App";
import {useGenieSelector} from "reactgenie-lib";
import {Counter} from "../genie/Counter";
import React from "react";
import {CounterListView} from "./CounterListView";
import {View} from "react-native";

export const MainView = () => {
    const allCounters =  useGenieSelector(() => {
        return Counter.All(); //get all counters
    });

    return (
        <View>
            <View >
                <button onClick={() => {
                    //create a new counter to edit
                    const counter = Counter.CreateCounter({name: "", type: "default",created: false});
                    AppNavigator.push('EditCounter', counter)
                }}>Add New Timer</button>
            </View>

            <CounterListView elements={allCounters}/>
        </View>
    )
}
Click on the CounterItem to jump to the EditCounter page to edit it.
import React from "react";
import {Pressable} from "react-native";
import {useGenieSelector} from "reactgenie-lib";
import {Counter} from "../genie/Counter";
import {AppNavigator} from "../App";

const CounterItemViewImpl = (props: {id:string}) => { //pass the id to CounterItemView
    //...
        <Pressable onPress={() => {AppNavigator.push('EditCounter', {id: props.id})}}>
            <label>[{counter.type}]</label> <br/> <label>{counter.name}: </label> <br/> <label> {counter.count}</label>
        </Pressable>
    //...
)
}

export const CounterItemView = CounterItemViewImpl//TODO: need to be linked
After editing, we can click the button to save the counter and jump back to the MainView page.
import React from "react";
import {useGenieSelector} from "reactgenie-lib";
import {Counter} from "../genie/Counter";
import {AppNavigator} from "../App";

//implementation
const EditCounterViewImpl = (props:{id?:string}) => {//pass the id to EditCounterView
    //...
            </div>
            {
                //show different UI for creating and editing
                !counter.created?
                    <div>
                        <button onClick={() => {
                            counter.created = true;
                            AppNavigator.pop()
                        }}>Add Counter</button>
                        <button onClick={() => {
                            counter.delete();
                            AppNavigator.pop()
                        }}>Cancel</button>
                    </div>
                    :
                    <div>
                        <button onClick={() => {
                            AppNavigator.pop()
                        }}>Save Counter</button>
                        <button onClick={() => {
                            counter.delete();
                            AppNavigator.pop()
                        }}>Delete Counter</button>
                    </div>
            }
    //...
    );
};
//binding
export const EditCounterView = EditCounterViewImpl; //TODO: need to be linked
Now we can run npx expo start --web to test the UI and
click the button to check whether we can get a new page.
1.5 Link State Code to UI
After we complete the UI code and state code, we need to bind them together with GenieClassInterface() and set up the initialization of ReactGenie.
We need to annotate the data type used for display in the corresponding UI, so that when ReactGenie gets the executed results, it will choose the proper UI based on the result type to display the results.
The parameters for GenieClassInterface are: DataType(string), displayTitle (string | function return string), Priority(number | function return string, large means high priority). Priority is optional. You can bind different UIs to the same data type and ReactGenie will choose the UI with the highest priority to display the results.
We can bind the counter and counter list to the UI code
import { GenieClassInterface } from 'reactgenie-lib'

const EditCounterViewImpl = (props: { id?: string}) => {/*UI code*/}

export const EditCounterView = GenieClassInterface(
    "Counter",
    "Create a Counter",
    (target: Counter) => target.created ? -1 : 1
)(EditCounterViewImpl)import { GenieClassInterface } from 'reactgenie-lib'
const CounterItemViewImpl = (props: { id: string}) => {/*UI code*/}
export const CounterItemView = GenieClassInterface(
"Counter",
(counter: Counter) => `${counter.id} Counter`,
(counter: Counter) => counter.created ? 1 : -1
)(CounterItemViewImpl)import { GenieClassInterface } from 'reactgenie-lib'
const CounterListViewImpl = (props: { elements: { id: string }[] }) => {/*UI code*/}
export const CounterListView = GenieClassInterface("Counter[]", "Counter List")(CounterListViewImpl)So far, we have completed the implementation of the UI code and their binding with the corresponding data types.
Then we need to modify store.ts to finish initialization.
If we overload the setup() function in the class, it will be automatically called in initReactGenie().
If we want to manually complete the initialization, call our initialization function after initReactGenie().
export const reactGenieStore = initReactGenie();1.6 Add Examples and Test
Finally, we need to add usage instances for your program to help ReactGenie correctly generate executable results using LLM. We need to provide examples of relevant function usage in each class.
Examples is a static list in GenieClass.
export class Counter extends GenieClass {
    //...
    static Examples = [
    {
        user_utterance: "Increse this counter",
        example_parsed: "Counter.Current().increment()",
    },
    {
        user_utterance: "show me all vegetables counters",
        example_parsed: 'Counter.All().matching(field: .type, value: "vegetable")',
    },
    {
        user_utterance: "increase me all fruit counters",
        example_parsed: 'Counter.All().matching(field: .type, value: "fruit").increment()',
    },
    {
        user_utterance: "Delete this counter",
        example_parsed: 'Counter.Current().delete()',
    }]
}//Right
"Counter.CreateCounter(type:\"fruit\", name:\"apple\")"
//Wrong
//"Counter.CreateCounter({type:\"fruit\", name:\"apple\"})"To help users achieve more interactions, ReactGenie supports some filtering operations on arrays.
matching(field, value), equal(field, value)
between(field, from, to), sort(field, ascending) Note that the field passed to sort() and between() should have a static compare() function.
contains(field, value) The contains() returns the member whose field value contains the given value.
All this filtering operations return a array.
For example:
{
    user_utterance: "show me all vegetables counters",
    example_parsed: 'Counter.All().matching(field: .type, value: "vegetable")',
},
{
    user_utterance: "show me all counters less than five",
    example_parsed: 'Counter.All().between(field: .count, from: 0, to: 5)',
}
ReactGenie also supports some querying operations on arrays. ReactGenie allows developers to access the properties and functions of list members during execution. This can be used directly to access the properties of the list members.
{
    user_utterance: "Show me all counters type",
    example_parsed: 'Counter.All().type',
  },
  {
    user_utterance: "Delete all fruit counters",
    example_parsed: 'Counter.All().matching(field: .type, value: "fruit").DeleteCounter()',
  },
Another function is built by ReactGenie to provide rich multimodal interactions is Current().
Current() is automatically created for all DataClasses, and it returns the current object that is being interacted with.
Make sure the examples cover these features:
- Current()
{
    user_utterance: "Increse this counter",
    example_parsed: "Counter.Current().increment()",
}- Filtering operations on list (e.g. matching)
{
    user_utterance: "show me all vegetables counters",
    example_parsed: 'Counter.All().matching(field: .type, value: "vegetable")',
}- Function call or Get properties on list
{
    user_utterance: "Delete all fruit counters",
    example_parsed: 'Counter.All().matching(field: .type, value: "fruit").delete()',
}- Functions user might use (e.g. delete())
{
    user_utterance: "Delete this counter",
    example_parsed: 'Counter.Current().delete()',
}We have completed a simple multimodal interactive application based on ReactGenie. Congratulations!